

SSO is available for customers on the Enterprise plan. Setup requires the Admin role in your Profound organization.
Before you start
You’ll need:- The Admin role in your Profound organization
- Administrative access to your IdP
- The domain you want to enable for SSO
- An account in your IdP on the SSO domain, for running the test sign-in
- Access to your DNS records to verify domain ownership
Setup steps
1
Open the SSO configuration portal
- In Profound, select your organization name at the top left of the screen, then select Settings.
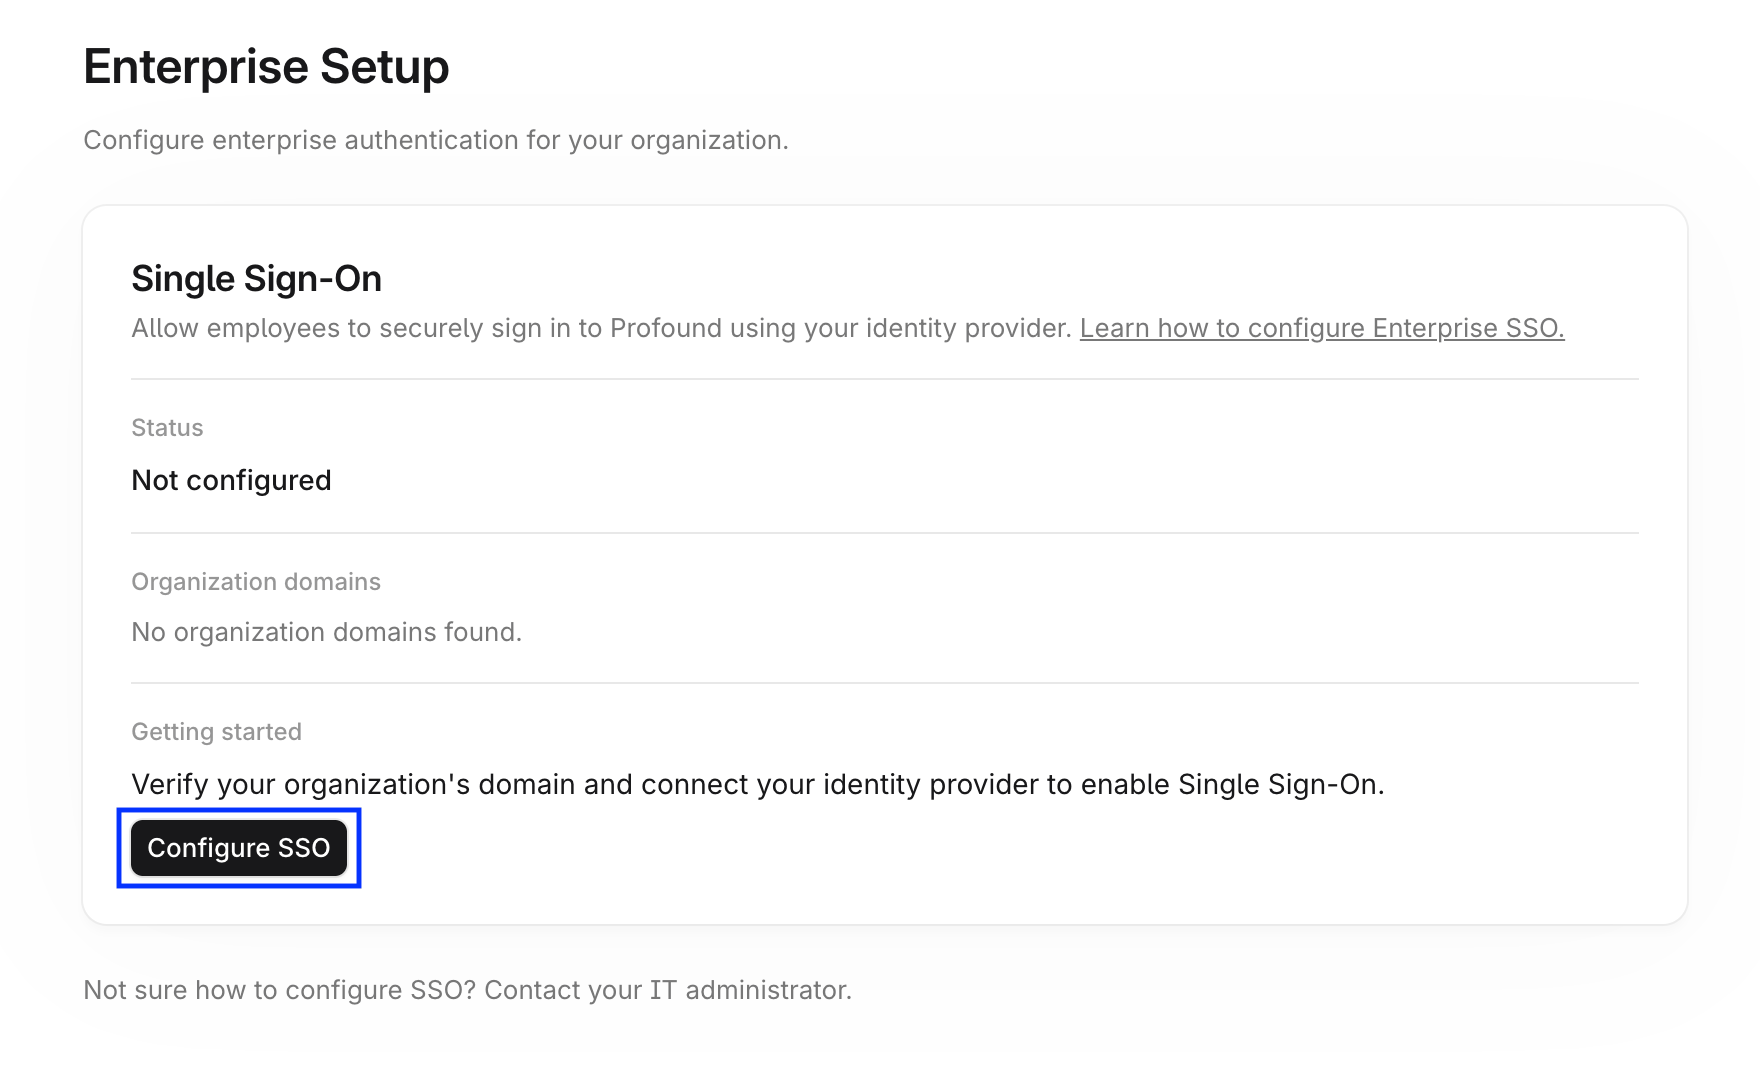
- Select Enterprise Setup under Organization in the left navigation sidebar. The Single Sign-On card shows your current SSO status and verified domains.
-
Select Configure SSO to open the configuration portal.
2
Verify your domain
Follow the domain verification step in the portal and add the record it provides to your DNS. Verification confirms your organization owns the domain and unlocks the rest of the configuration.DNS changes can take up to 48 hours to propagate, and usually appear within 15 to 30 minutes. Select Check status on the Enterprise Setup page to refresh.Notes:
- Each domain gets its own verification value, so add the record to the domain it was issued for. For example, a record issued for
www.example.combelongs onwww.example.com, andexample.comneeds the separate record issued forexample.com. Add the record alongside any existing TXT records on the host instead of replacing them. - Verify the domain that appears in your users’ email addresses. For example, if your team signs in with
name@example.comaddresses, verifyexample.com, even if your IdP runs atexample.myidp.com. Profound checks the email domain of each user who signs in against your verified domains, and rejects the sign-in when it doesn’t match or when your organization has no verified domains. - Keep the verification record in your DNS after setup. Profound rechecks it, so removing or changing it returns the domain to Pending and sign-in through your IdP stops working until the record is restored.
3
Select your identity provider
Select your IdP from the list of supported options. After you select it, the portal shows setup instructions specific to your provider.If your provider isn’t on the list, use the custom SAML or OIDC connection option.
4
Follow the IdP-specific instructions
The portal walks you through connecting your IdP to Profound. It shows the values to copy from Profound into your IdP, and the values to retrieve from your IdP and enter into the portal.The values you exchange depend on your SSO protocol:Follow the instructions shown in the portal for your specific IdP and protocol.
- OIDC
- SAML
- Profound → IdP: the Authorized Redirect URI
- IdP → Profound: the Discovery Endpoint, Client ID, and Client Secret
5
Test the connection
The final step in the portal validates your connection. Select Test sign-in to run a real sign-in through your IdP. The portal redirects you to your IdP, you sign in with an account on the domain you verified, and your IdP returns you to the portal with the result:
- Test successful: your IdP returned a valid response and the connection is configured correctly.
- Test failed: the portal shows the validation error and debugging steps. Repeat Step 4 to correct the connection values, then run the test again.
- Testing happens in your own Profound organization, a separate test organization isn’t needed.
- Running a test sign-in only affects the account you test with.
- Your team keeps signing in as usual until you enable SSO in the next step.
6
Enable SSO
After the test passes, enable SSO for your domain directly from the portal. Back on the Enterprise Setup page, the status reads SSO Enabled and your domain is marked Verified. Select Check status to refresh.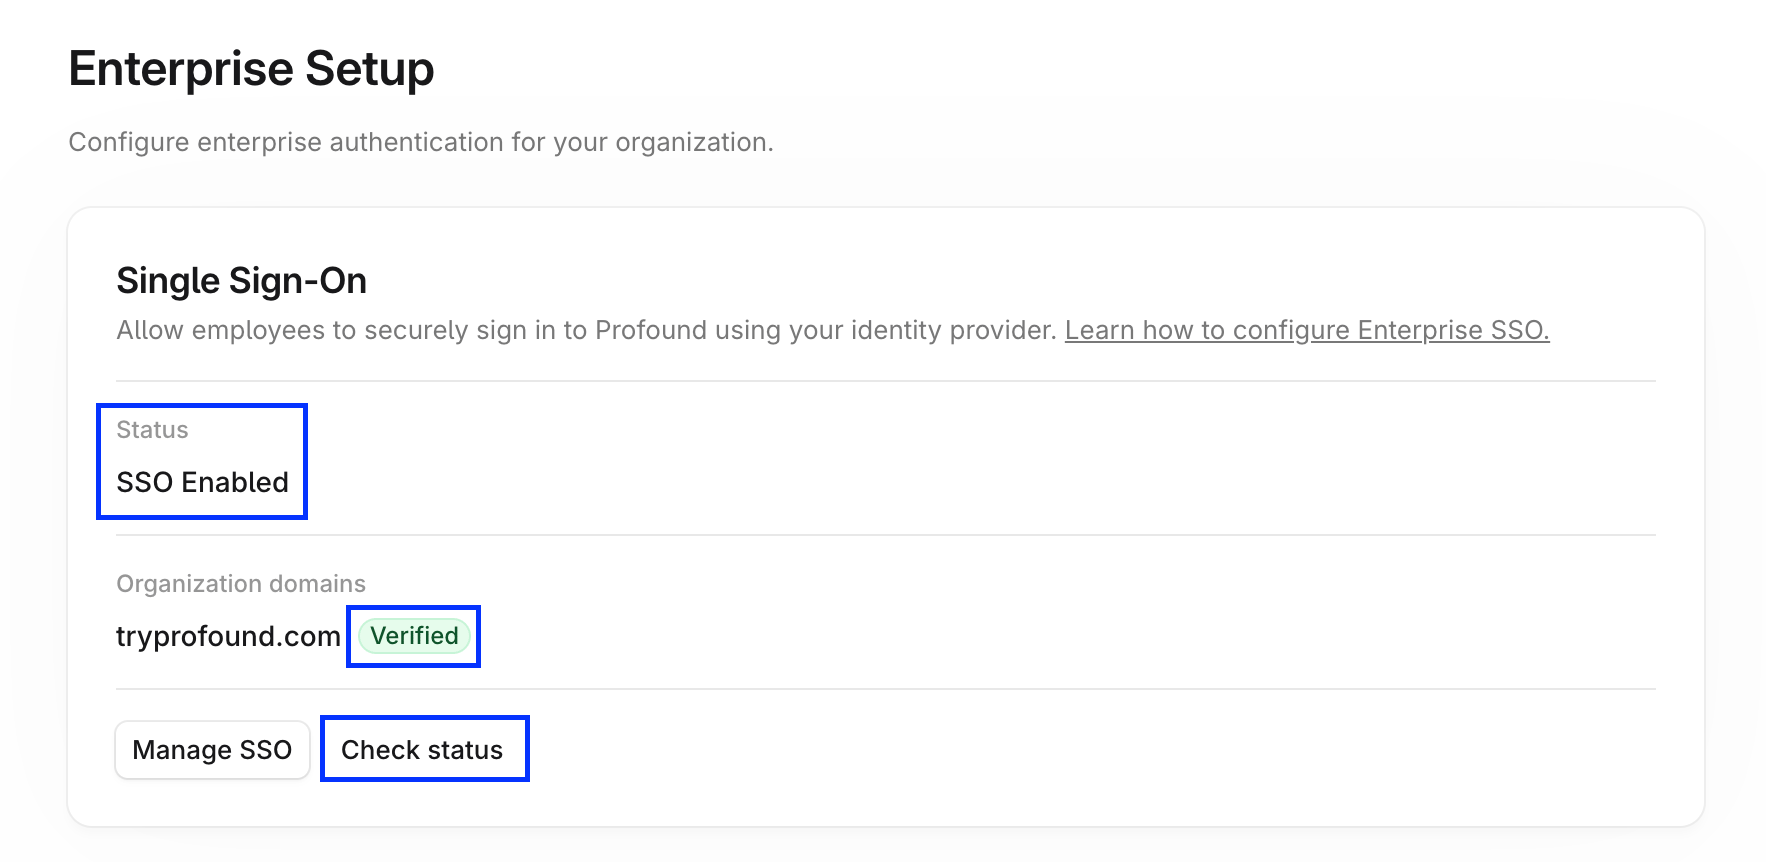
Notes
- Each Profound organization needs its own SSO connection.
- Subdomains can’t use the same SSO connection as the root domain: each subdomain needs its own connection.
- Keep each domain’s verification TXT record in place for as long as SSO is enabled for that domain.
- For SAML connections, renew your IdP signing certificate before it expires. The Single Sign-On card shows a warning as the expiry date approaches.
- Contact customer support if you need help during setup.